Search This Blog

Wednesday, November 12, 2014

Fancy a Cheesecake Brownie?

Do you like cheesecake? And brownies? Here’s the perfect recipe to marry the two and give yourself a sugar high in the process. But a delicious sugar high at that. I’d heard about cheesecake brownies for ages, but never eaten or made one. Since I seem to have a lot of free time on hand nowadays, I found myself a recipe and decided to try it. End result, everyone who ate it seems to be utterly enamoured by it. I still prefer my brownies and cheesecake separate. But hey, we must give the people what they want. And if cheesecake brownie is what they want, then cheesecake brownie is what they’ll get.
Don’t skip any of the steps, or take shortcuts. You absolutely must let the cake cool in the fridge for 3-4 hours, if not overnight. Otherwise the cheesecake layer won’t set. Also, this is best eaten chilled. The brownie layer is more fudge-like, than cake-like.
Here goes.

Ingredients
120 grams butter
120 grams dark chocolate
200 grams brown sugar
1 teaspoon pure vanilla extract
2 large eggs
65 grams flour

Cream Cheese/ cheesecake layer:
225 grams full fat cream cheese, at room temperature (I used Flanders Mascarpone)
65 grams castor sugar
1/2 teaspoon pure vanilla extract
1 large egg
1 tbsp dark rum

Process:
Preheat oven to 325 degrees F (160 degrees C). Prepare a baking tin, around 8-9 inches with baking paper.
In a double boiler (take a glass bowl which won’t shatter with heat, and hold it over a pan of simmering water), melt the butter and chocolate.
Remove from heat and whisk in the sugar and vanilla extract and rum. Then add the eggs,

one at a time. Keep whisking. Stir in the flour and keep whisking the batter. Remove 1/2 cup of this brownie batter and keep it aside. Pour the rest of the brownie batter into the prepared pan.
For the cheesecake layer:
In another bowl, whisk the cream cheese/ mascarpone with a hand mixer till it is smooth. Then add the sugar, vanilla, and egg and beat till creamy and smooth. Now spread this batter over the brownie layer. Spoon little drops of the reserved brownie batter on top of the cream cheese batter. Run a wooden skewer through this top layer till it has a marble effect.
Bake in the preheated oven for about30 minutes or until the brownies are set. Remove from the oven and cool completely. Do NOT take it out of the tin. Then cover and refrigerate the brownies  for 3-4 hours or overnight. Once chilled, remove the brownies from the pan by lifting with the ends of the baking paper and transfer to a flat surface. With a sharp knife cut into squares. Keep wiping the knife with a damp cloth between cuts.


Tuesday, September 16, 2014

How To Make The Most Divine Mutton & Mince Korma Ever

Around a month back I read a recipe from Pamela Timm's book - Korma, Kheer and Kismet. It was a mutton korma recipe from Ashok and Ashok Meat Dhaba. Very few ingredients and the deadly combination of mince AND mutton. I finally got around to making it and it is simply delicious. I tweaked the recipe slightly, skipping the slow cooking process totally.  Here's how I made it.

Ingredients
3 tbsp ghee (I used cow ghee)
1 onions, peeled and grated
1 tablespoon freshly grated ginger
1 tablespoon freshly minced garlic 
1 tbsp garam masala 
1 brown cardamom 
3 green cardamoms 
3 cloves 
5 black peppercorns 
250 gms minced mutton (I got it put through the mincer twice) 
600 gms mixed shoulder and rack of mutton 
1 tsp turmeric 
1 heaped tsp red chilli powder 
2 tsp salt 
6 green chilis finely chopped
5 medium-sized tomatoes, finely chopped 
Grated ginger and chopped coriander to garnish
Method
Melt the ghee in a large pan. Add the onions, ginger and garlic and cook until well browned, 10-15 minutes. Add the garam masala, brown and green cardamoms, cloves and peppercorns and stir well. Add the minced mutton and mutton pieces, coating well with the spices. Stir in the turmeric, chilli powder and salt.
Then cook on a low heat for about 20 minutes until everything is well browned. Add the chopped tomatoes, chilis and enough water to cover the meat. Pressure cook for 12 whistles.
Check seasoning and add more salt or chilli if required. Garnish with grated ginger and fresh coriander.
You should ideally eat it with roti. But being a good Bong, I ate it with rice. 


Saturday, August 2, 2014

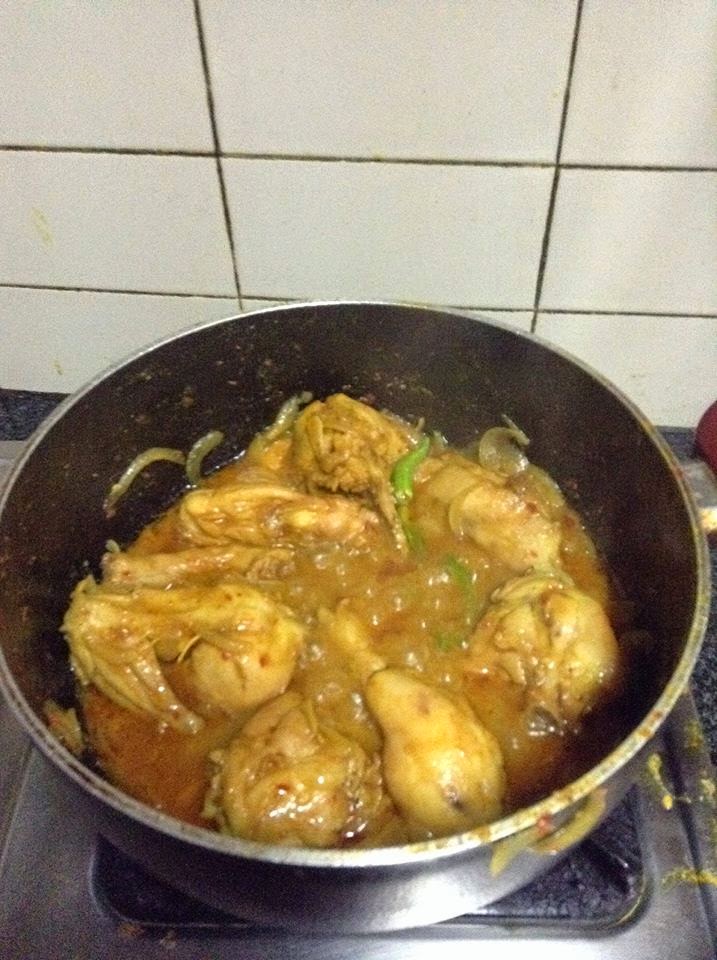
Goalando Steamer Chicken Curry - Sharing The Joy

 The story goes that Goalando Steamer Chicken Curry is named after a curry which was served on a steamer which used to carry people across the Padma river. Goalando was the name of a tiny railway station on the Padma bank. From here passengers would cross the Padma on steamers to make their way to Narayanganj and then to Dhaka by train. The steamer ride was an overnight journey and the boatman would supposedly cook a chicken curry with the bare minimum of spices and ingredients. And it is this chicken curry which is the Goalando Steamer Chicken Curry.


I tried to make it for the first time tonight. And boy, was it wonderful. It is extremely easy, stunningly delicious and is perfect for a day when you realise that you forgot to restock your spice cupboard. I looked at a bunch of recipes and all of them had some constants. I did tweak the recipe slightly (and I’ll let you know where), but you can just stick to the original recipe.

This uses no water and has a lovely red gravy. The wonder is when you peep into the pan while the chicken cooks and watch what seems to be a dry chicken, slowly start swimming in gravy, and then watch the colour of the gravy change from yellow to a sunset red.

You can leave out one of the chilis used – red or green - if you’re spice averse. I used both and think they both add their unique flavours to the gravy and the specks of green and red look lovely in the gravy.

Ingredients
1 kg chicken pieces on the bone
6 onions - sliced 
2 tablespoons garlic - freshly minced
2 tablespoons ginger - freshly minced
4 dry red chillies - bashed into small pieces
8 green chillies - sliced 
1 teaspoon turmeric powder
½ cup mustard oil (do not scrimp on this)
1 teaspoon salt

Method: 
Marinate the chicken in all the ingredients and keep it in the fridge for at least 30 minutes. Heat a pan and add the marinated chicken to it. First cook on high flame for 2 minutes, till the chicken starts boiling. Then turn the flame to medium and cook the chicken with a lid on. You can keep checking the chicken and stirring it. In about 20-30 minutes (depending on the quality of your chicken), you should be done. The pan will have a lovely reddish gravy from the onion. Do not add any water.

I also added a teaspoon of sugar in the marinade, which is pretty imperceptible in taste, but accentuates the spiciness of the dish. The onions will impart a sweet balance as it is, so you can skip the sugar if you’d like.

Serve it with hot rice. This is truly delicious. I’m sorry I don’t have pictures of the final dish, but I ate it up before I could take a picture.  

Monday, November 5, 2012

Three-minute chocolate coffee cake


So I just read a recipe posted by Jaya Nair and I had to try it out because it looked so yum and quick. A cake which can be microwaved in 2 minutes. This was too good to be true. But no, Jaya seems to be a messiah of sweet cravings which can be sated in minutes. May the dessert gods bless her. I no longer have to crave a hot chocolate fudge sundae from Nirula's at an unearthly hour. I can just whip this up. It's also a super-easy dessert to make if guests arrive suddenly. It took me 10 minutes from taking out the ingredients to taking the cake out of the microwave. I did tweak her recipe just slightly, because I'm a coffee and alcohol fiend. 
Recipe

4 tbsp flour
4 tbsp sugar (white or brown)
3 tbsp unsweetened cocoa powder
1 tbsp instant coffee
1 tsp baking powder
1 egg
3 tbsp milk
1 tbsp dark rum
3 tablespoons cooking butter (I used 2 tbsps butter and 1 tbsp saffola veggie oil)
2 drops of vanilla extract (optional)

How I made it:

Mixed the dry ingredients in a bowl. Add egg, milk, butter/oil, vanilla essence and rum. Fold well. Pour into a microwavable dish. Remember it will rise because of the baking powder, so your dish should be at least 1.5 inches above the level of the batter. Microwave for 3 mins. And it’s done. And was delicious. 

Saturday, November 3, 2012

Khao Suey (Burmese noodle and soup dish)


One of my favourite comfort foods and pick-me-ups of the non-sexual kind is a big bowl of Khao Suey. In Calcutta, every home has its own recipe for khao suey. Some use more coconut, others less, some have 20 accompaniments, some have 5. Some put bhujia on their khao suey, some would rather die than do that.

So since I was feeling particularly whiney, utterly unappreciated and like nobody’s child, I of course decided that it was high time I made myself a bowl of Khao Suey.


So here it is. All measurements are approximations. So tweak it to your taste. My friends and family lick the bowl clean every time I’ve made this, so I think if you stuck to the recipe you wouldn’t fare too badly. Enjoy.

Recipe

1 packet egg noodles
2 tbsps garlic paste
2tbsps ginger paste
2 onions (paste)
2 tomatoes (skinned and pureed)
2 tsp red chili powder
500 ml coconut milk
250 gms boneless chicken chopped into small pieces

For vegetarians, replace the chicken with chopped mushrooms, brinjals and paneer

1 tsp freshly ground Garam masala (equal portions cinnamon, cardamom and clove)
Accompaniments
1 small bowl chopped spring onions
1 small bowl chopped lemon
1 small bowl chili flakes
1 small bowl roasted garlic
1 small bowl crisply fried baby prawns
1 small bowl sliced boiled egg
1 small bowl chopped coriander

Recipe:
Take a teaspoon of vegetable oil. Add the onion and ginger and garlic pastes. Saute till it changes colour. Then add the chili powder. Keep sautéing. Then add the chicken pieces. If making the vegetarian version, add the vegetables now. Keep sautéing till the chicken changes colour and is coated with the pastes. Then add the tomato puree and salt to taste. Once again, sauté till the tomato puree is cooked through. Then pour in the coconut milk, bring to a boil once and simmer for 10 minutes. Add the garam masala powder at the end, stir and take off the flame. 

In the meantime, boil the noodles.

To serve: 
Each person should have a large soup bowl, in which they take one serving of noodles. Top it with as much soup as they want and the accompaniments of their choice. The lime should be squeezed on the individual soup servings. 
We usually serve this at home with spring rolls and steamed momos.

Tuesday, October 2, 2012

Chingri Malai Curry or The Stuff Dreams Are Made Of


So I finally got over my laziness to write and decide to carpe the diem and the prawn. This is a staple in any Bengali home and the most bastardised dish in almost every restaurant, especially in good old Delhi.  But this is how we make it at home, and I’ve at least never got any complaints.
The recipe I’ve given is for prawns with their heads on. But if you’re using headless prawns, then skip the first step of smearing the prawn with haldi and salt and frying them. This is done with prawns with head, because the head takes a while to cook. Also two tricks to remember are, use fresh home-made garam masala. Not that rubbish you get in the market. And cook the prawns just till they turn opaque. No more. Or you’ll get some rubbery crustaceans to chew on. This is absolute comfort food and really luxe.  Enjoy.
 
CHINGRI MALAI CURRY
Take 500 gms prawns.
If they have their heads on, smear them with turmeric and salt. And in hot oil, fry the prawns for barely 2-3 minutes till they turn pink. Remove prawns.
If they’re headless prawns, skip the earlier step.


In the same pan, add whole garam masala (cinnamon, cloves, cardamom). Once the garam masala stops spluttering, add onion paste of 1 large onion. Saute till it changes colour. Then add a tbsp of ginger paste and 4-5 slit green chilis and 1 tsp of chili powder. Keep sautéing. Then add the prawns, sauté till slightly pink.  Add a tsp of sugar and salt. 


Then add one tin coconut milk. Stir, let come to a boil. 
Cover and cook on low flame for 3 to 4 minutes. Add a tsp of garam masala at the end.  Stir, remove from fire. It should be a lovely pale yellowy cream colour. 

Dig in.  


Tuesday, September 4, 2012

Feeling Crabby


I teach a cooking class nowadays, which has led to me cooking dishes which I rarely cook at home unless I get an order. As a result of which, I’m also getting to partake of some of my favourite home delicacies.

And today, after ages I cooked Kankrar Chorchori or Dry Crab Curry-Bengali style. And yes, I know the North Indian phobia against eating seafood during months with the letter R in it and the rainy season. All nonsense. Pay no heed to it. Go to your market, buy a kg of crabs. And to make sure you don’t actually get some fell monsoon disease, make sure the crabs are alive when you buy them. Then turn your head while they’re killed by the fishmonger. It’s all for a good cause after all – yummy for your tummy.
The picture was taken by a very dear friend of mine when I cooked it the last time.

Here goes:
KANKRAR CHOCHORI
In hot oil, add a tsp of panch phoron. When the panch phoron starts spluttering, add the paste of one large onion and a tbsp of ginger paste and a tsp of garlic paste. Saute. Add 1 tsp of chili powder and a 1tsp of cumin powder. Saute. Add some split green chilis. Then add puree of 2 tomatoes. Saute for 5 to 10 mins. Then add the crab (1 kg) and around two sliced potatoes which have been fried. Stir the crab and potatoe till coated with the masalas. Add a cup of water. And 1tsp of salt and sugar.  Cover and allow to cook on low flame for 10-15 mins till crab is done. Then sprinkle with garam masala (freshly ground) and take off flame.